Category Archives: DPP

Assignment 5: Personal Project

Assignment Brief

Produce 10-12 images on a subject of your choosing using techniques learnt within this course.

Background

At first I struggled with this as the brief seemed so wide open that the freedom to choose my own subject actually felt like a hindrance to me. I drafted a number of possible subject areas and then identified the individual areas I could photograph. After some debate with my tutor on finding an appropriate subject that would match the course brief but also be feasible for me to undertake, my original ideas of British icons was put back to a personal project idea and my interest in urban decay and ruined buildings came to the fore. I very much wanted to keep within my specific style of photographing the unusual and this fitted really well. I’m a very big fan of urban decay and exploration with books by Romany (2010) and Margaine (2009) being inspiring, however I have to admit that access and safety issues certainly influenced the locations I would be visiting.

My idea started off as photographing decayed buildings and structures but it evolved after I’d taken some images in the Peak District into a more rounded subject of ‘Forsaken’ featuring anything that had been abandoned, reclaimed (by nature or people) or reused. Forsaken refers to the fact that at some point a decision has been made to abandon or leave a building or item and while at some point there might be re-use, it’s not immediate and not everything gets a new lease of life.

Workflow

I copied the images into a working folder where I could work on these and still keep the originals elsewhere as a back-up. I went through and deleted those that were obviously technically imperfect and those which lacked the impact I wanted.

I then shortlisted the images twice and when I was satisfied that I’d chosen the strongest images based on the composition, technical quality and whether it matched my brief of reuse, reclaim or abandonment. I then used Photoshop CS6 to edit these and my shortlist was 22 images. For the next stage I had these printed and then I looked at them all and chose a selection of the strongest images and those that I liked. For some it was as simple as choosing the monochrome version as it had more punch and a stronger feel of the dereliction and abandonment. I shortlisted this selection down to 12 images which I would then submit in prints and book format.

Presentation

While the brief requires prints to be submitted as part of this assignment, I’d also had an idea about a supplementary method of presentation. When I’d visited the Impressions gallery in Bradford, they had a number of small 6×4 soft booklets for sale and the one that caught my eye and is now in my learning log was on ‘Vacant Possession’ where the photographer Rowan Drury had captured images of properties that had been left but where the residents had left possessions behind. The subject matter of abandoned possessions complimented my chosen area and would be something that I’d like to work in in another project. I liked the format of it and thought that it would complement my prints but also be something that could be viewed on its own. One issue that I found while researching this was that printing a small one off booklet required a minimum number of pages which was more than double the number of images I had to submit. As the booklet I’d seen had a small introduction in it, I then thought that I could intersperse the images with text about the subject to make this viable.

The Images

East Buxton Lime Works steps (reclaimed)

The East Buxton Lime works was opened in 1880 adjacent to the Midland Railway west of Millers Dale Station. The kilns were served by a narrow gauge tramway from the adjacent quarry and the tipping skips were hauled up an incline to be emptied into the two pots. While the production ended here in 1944, the path to the top of the lime kilns is still in place and you can see the old tram track and climb to the top and also go into the kilns. This image shows the steps leading up into the kilns. I also took an alternate image of just the steps which I loved but compared to this one, it didn’t tell a story, and it didn’t suggest that there was a place to explore; it could have been steps anywhere. By altering the composition within the frame and expanding this, I’m making it clear that I want the viewer to think about going up those steps and through that doorway and wondering what lies beyond.

image

Broken door (abandoned)

image1) ©Mick Garratt


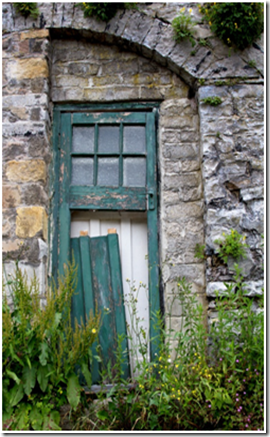
This is part of Dale View Terrace at Cressbrook close to Cressbrook Mill. These was a residence built in 1817 to house apprentices from the mill and was later changed into individual houses. As I walked past, these were sat higher up from the path I was walking on and the green door caught my eye making me wonder why it was abandoned and what was behind it. Attached to the terrace is a Victorian castle folly that was designed to disguise the workers cottages sitting behind this and when I passed it was a café that had closed down.

image

I feel that the colours really work well and grab the eye with the contrast of the green door and the stone of the building surrounding it, it was important that I had the low angle so that the viewer can see the grass and weeds growing up in front of the doorway and the focus on the broken wood as only then does it become clear that this entrance is now abandoned and hints that the rest of the building has also fallen by the wayside.

Monsal trail tunnel

The Monsal trail is the converted Midland railway route running from outside of Buxton to Bakewell. While the route has been open to the public since 1981, due to safety reasons the four railway tunnels built on the route had been closed until 2011 when a full refurbishment of the trail was finished. Now the abandoned and unloved tunnels are fully open and visitors can pass through Headstone tunnel, Cressbrook tunnel, Litton tunnel and Chee Tor tunnel, the route has been lit, paved and tidied up to have a new lease of life.


image2) ©Rowsley Association

LMS Compound No.1050 is seen here passing over Monsal Dale viaduct having just left Headstone Tunnel

image3) ©Andrew Abbott


This image shows a cyclist as I wanted to capture reuse and the change from rail to cycle, giving a new lease of life to the area and the tunnels. While the tunnels are quite heavily utilised by cyclists, I had to wait to get one from the entrance coming in towards me and be ready to capture them at the point I wanted in the frame. I wanted to ensure that from the left to the right there was detail that the viewer would look at. Inside the changes extend to a newly laid flat path and lighting but the grime of the steam era is still present and the individual cut outs in the side of the tunnel are still there. I converted this to monochrome as the original image was almost there with the grey tones and helps to remove some of the yellowish artificial light in there.

image

Stone Barn (reclaimed)

While a derelict or ramshackle barn in the country isn’t an unusual site on its own, this old barn in the Peak District has very much been reclaimed by nature with the trees having grown up through the empty space and missing roof over the years. Nature is very much here to stay. I encountered this on a walk as the path led past it, and while I saw many derelict and abandoned barns, this was the first one that looked most intact apart from the trees in the middle, and it was this unusual aspect that made me stop. I took a number of different images from this one to one that was cropped closer but it didn’t have the same impact and I liked the wider angle view as the viewer could then see the fact this barn was surrounded by other trees and landscape. One thing I try and do is to place an image in the context to help a viewer read the text.

image


Outhouse Manchester (reuse)

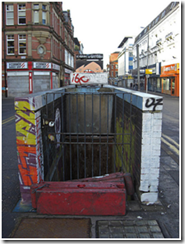
The three blocks that comprise ‘Outhouse’ used to be public toilets. Located in Manchester on the Northern Quarter’s Stevenson Square, Outhouse is an outdoor project space for public art with this being changed every three months.

image4) ©Michael Ely

This was the first time I’d visited this particular area in Manchester and wasn’t expecting to see such a large area of artwork. The strong reds caught my eye and I took a number of images from different angles, my favourite two are here, I like the wider shot as it shows the structure in the context of the street square. You can recognise that this used to be a public toilet but its new lease of life really catches the eye and attracts attention and also provides a splash of colour in the area. I had two different versions of this to choose between, I used Photoshop to draw a lasso around the building so I could then turn the background to monochrome, it was almost there with just some highlights of orange on the buildings behind. I kept the other as it was with full colour and when I compared the two printed versions, I thought that the monochrome version made the outhouse stand out even more and really show it off. In the colour version there was a distraction in the orange Koffee Pot shop front and using the monochrome conversion with the highlighted red area focuses the viewer on what I want them to look at.

image

image

The second image was the artwork painted onto the end, I didn’t do much processing apart from slightly increase the blacks and saturation. I liked this as it could be any building that has been rescued, it’s not quite as obvious as the other as to its previous life and I found that when it was printed out it really catches the eye. The graffiti style artwork can also be viewed in two different ways, a modern way to brighten up an old unused building or as an ugly defacement in a city centre. The ways that viewers will read this differs accordingly as we all bring our own views and opinions to photography and art and as a part of this series I can influence how I want these to be seen through my theme.

Communications pylon (abandoned)

This is a former electricity/communication/telegraph pole that has been abandoned and is now mingling in with the trees. However it is quite eye-catching and still has its original earthing pots and wires attached. While this is off the path slightly, it’s easy to access through the flattened grass so I wasn’t the first person to take a closer look. I converted this to monochrome as I wanted to get a more timeless feel of when it was still working. With this, the appeal is that it’s blending into the trees and is partially hidden, and the conversion to monochrome just helped with making this match the tones and lines of the trees, aiding the reclamation effect.

image

Bowling green pavilion (abandoned)

image5)  © Francis Frith

Bank Park was opened as a public park in 1873 as a welcome green space within an area of heavy industry. Adjoining Bank Hall, later to become the Town Hall, the park features a bowling pavilion that is no longer used and is abandoned and boarded up, watching over empty bowling green’s while waiting long debated regeneration. I tried a number of close up images of different sides of the pavilion but it was hard to see what the building was, with the face on view I feel that the impact is stronger as you see the whole of the building and the full extent of the graffiti and boarding up. The face on view is more a traditional viewpoint that someone would look at or photograph the building. I personally preferred the view from the front and composed the image so that the path was also leading the eye in picture. I tried a mono conversion but the colours brought this alive so I kept to the original.

image


Millers Dale

Miller’s Dale was at its time an important and high volume railway junction used both for passengers moving between Manchester and London via the Midland Railway and agricultural and quarried freight.

image 6) ©John Alsop Collection

Viaduct (reclaimed)

This second viaduct was built around 1905 and was in existence until the line closed to all rail traffic in 1968. Now access is restricted and has been reclaimed by nature as the older viaduct is still open and providing part of the Monsal trail access. This caught my eye as I really like to see plants and grass interwoven with aging metal, and seeing nature reclaiming the bridge gave it a real sense of being abandoned and forsaken. I converted this to monochrome as the pattern of the bridge was really strong and fitted in well with this.

image

Monsal trail via the Midland Railway line at Millers Dale (Reused)

image7) ©Chris Jennings

Since the railway was closed in 1967 the station has become a car park serving the Monsal Trail, although the main buildings remain, being used as a ranger station and public toilets .The station platforms are still there and while there is no railway line anymore, you still get a sense of the route taken. I enhanced the sky slightly using Photoshop and the dodge tool just to bring out some of the clouds and then converted it to monochrome as the leading lines are quite strong and it worked better than the colour version. It has a very lonely feel to it with no people or action taking place which is exaggerated by the strong sky and the monochrome colour.

image

Garnett’s Cabinet Works (abandoned)

image Copyright unknown

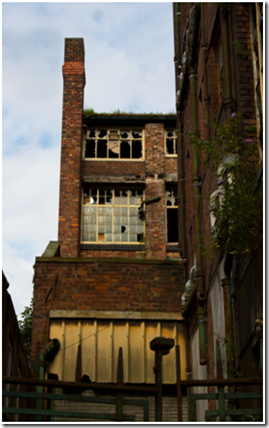
Originally built in 1890 and added to over subsequent years, the building that used to be Garnett’s cabinet works has been abandoned for years and is slowly getting more and more derelict. There are parts of the building that have collapsed over time and now the safest way to see this is from the outside. It’s hard to get a clear view from the front of the site as it’s fenced off and partly obscured. I went around the back where the safer part of the building is, the windows are broken but the building looks quite intact and from this angle you don’t get an indication that it’s derelict with rotting floors inside. The dereliction is more obvious when I moved towards the end building. I kept this in colour as I liked the light, it was early in the morning and the sun was up so there is a golden glow. There was a telephone wire stretching across the middle of the image into the sky that was obvious so I used the clone stamp tool to erase this. Where there is a wire lower down, I’ve left this in the image as it’s not as obvious and to clone it out would be more obvious than leaving it in. The light is highlighting just where I wanted the viewer to look, as you then notice the darker building to the right of the image, secondly to the face on building in the light.

image


image

Summary

Now I’m looking back at this project, I feel very much that this is just an opener for a piece of work that fascinates me and one that I will continue with as I’d like to extend this into a larger body of work. One of my reflections is that it’s important to keep an open mind as some of the buildings and locations that I expected to work just didn’t and others had a really good impact that I didn’t fully see when I took the image. I did take my time with this, I took a lot of the images early in the process, planned visits and repeat visits and then spent a lot of time viewing the images both on a PC screen and also printed considering which I liked and which worked. It took some time to research and to write up and I also had a couple of weeks delay whilst waiting for responses on the use of some photographs that I wanted to use to show how the sites used to be. I was conscious that I needed to give owners of the photographs time to come back to me with permission usage too, and at the time of finishing up this assignment I was disappointed not to have received any responses, although where a website has had open information on the re-use of photographs this has been a great help.

While I initially thought that the open brief was too challenging, it helped me to work through what I liked, what I wanted to photograph and to know that sometimes an idea has to be put aside at times to be picked up later. As much as I enjoyed the content of this, it was equally important for me to learn the processes of a project and to follow these through from the conception through to the printing and presentation so that I can apply these to further projects.


Other Images

As a sample of some of the images that were part of the series but I rejected in favour of the others.

Bibliography

Badger, Gerry 2007. The Genius of Photography. Quadrille Publishing

Barrett, Terry. 2012. Criticizing photographs: An introduction to understanding images. McCraw Hill. 5th edition.

Drury, Rowan. 2001.Vacant Possession.

Margaine, Sylvain. 2009. Forbidden Places – Exploring our abandoned heritage. Jonglez

Romany, WG. 2010. Beauty in Decay: Urbex: The Art of Urban Exploration. CarpetBombingCulture

Photograph Credits and Copyright Details

1) Broken Door- Apprentice House, Dale View Terrace ©Mick Garratt via http://www.geograph.org.uk/photo/2422398

2) Train over Monsal Dale viaduct. © Rowsley Association via http://www.disused-stations.org.uk/m/monsal_dale/index17.shtml

3) Closed tunnel (Monsal Head Tunnel) ©Andrew Abbott via http://www.geograph.org.uk/photo/1787982

4) Outhouse/Public toilet Stevenson Square ©Michael Ely via http://www.geograph.org.uk/photo/1082257

5) Bank Park Bowling Green © Francis Frith Collection

6) Millers Dale ©John Alsop collection via http://www.disused-stations.org.uk/m/millers_dale/index.shtml

7) Millers Dale ©Chris Jennings via http://www.disused-stations.org.uk/m/millers_dale/index40.shtml

8) Copyright unknown

All of the above work available via http://www.geograph.org.uk is licensed under the Creative Commons Attribution-Share Alike 2.0 Generic Licence. To view a copy of this licence, visit http://creativecommons.org/licenses/by-sa/2.0/ or send a letter to Creative Commons, 171 Second Street, Suite 300, San Francisco, California, 94105, USA.

Web Gallery

I have to admit that I skipped this exercise, only due to the fact that I’ve had my own website with different galleries on it for around 4 years and feel that through maintaining and updating this, I’m covering the requirement.

My website is at http://www.saltwickstudios.co.uk

OCA Residential Study Weekend 1st and 2nd September

Reflections

Well it’s a little bit late in coming but I’ve finally got around to putting some of my reflections from the residential weekend onto paper (or screen) While it’s a couple of weeks since we were all there (it seems like a lifetime away now) there are many more blogs detailing the speakers and the subjects so in order not to replicate these, I’ve gone for what’s stood out for me.

Arriving in Leeds and First Night

I arrived a little later than planned travelling from work but wasn’t disappointed by the hotel, I had reservations about my room being on the ground floor near the lift but it was lovely and quiet and so plush. Although it was so large I felt a little lost in there. After dropping my stuff I went exploring in Leeds but was disappointed by the drizzle coming down that stopped my plans of an evening stroll with the camera. However I did take the free time to do some valuable work on assignment 5 of DPP and to rid my head of all things work related prior to the two days. I’d initially planned to travel up on the Saturday morning but changed it to the night before and I’m glad I did as I think this certainly cleared my head and put me in the right frame of mind for the weekend.

The hotel

I’d located the hotel a week before when I’d been in Leeds so I knew where it was, while the Friday night in the bar was crazily busy early on, for the rest of the weekend it was quiet and the opportunity to spread out and have the free space at break times and during the portfolio session was really helpful. It felt like a good place to study and certainly had plenty of charm. While we didn’t have drinks provided with the lunches (some juice might have been nice) the food we had was more than adequate with chocolate brownies at break and bowls of chips to fuel us at lunch. I did also learn never to dip a hard biscuit too after it decided to break and there was no elegant way of retrieving it! I certainly felt we were well looked after which we might not have had if we’d been in a chain hotel. I’d definitely return!

The conference facilities

The room was a little small and cramped at first, especially with the cameras and lighting set up for the filming. After a shuffle about where we moved the chairs into a more relaxed configuration we did have more space. Things were a little tight for space (and time) with the book review session, the patio door brought some welcome fresh air into the room and some unwanted air noise from the flights overhead! Only on the Sunday when we’d all checked out did the size of the room become a problem, people plus luggage and cameras made it more of a squeeze so a room to safely store the luggage would have been helpful, even if it was just extending the lease of a hotel room to share.

Day 1 (Saturday)

The first part of the day began with an introduction from all of us and what we wanted to get out of the day and then we progressed to a session on moving between the levels as we seemed quite a mixed group with people at all different stages of completing level one, two and three courses. While this was quite an interesting session, I did feel that coming to the final course within level one that I would have liked more of what I need to do to improve and I found that I was still wanting to know more about how I can improve and specifically more on the academic writing to accompany my work as opposed to presentation for assessment. However on the positive side we did get some tips from Peter during the portfolio session that I can use.

Guest Speaker- Mishka Henner

I wasn’t sure what to expect from Mishka Henner, I’d looked at some of his stuff online such as the Less Américains work and I have to say that it just didn’t grab me so I went into this session with no expectations and I have to say that I totally changed my mind after hearing him speak.  Henner essentially uses the images available to him through sources such as Google street view and forms these into coherent series such as the Dutch Landscapes and also No Man’s Land. A lot of the discussion was about the appropriation of images and whether there had been any communication or agreement between Henner and Google for the use of these.  The ideas he has and the output through websites and books were quite refreshing and he does seem to have a number of ideas bubbling on the surface. We got a very real world talk on the pitfalls of his work, the high cost and low turnover of his book sales and how he can be subject to vitriolic criticism through the internet for some of his work. I appreciated his honesty and openness and certainly came away from the session impressed. After all the email debate on speaker to choose and different options where I very much had my view from what I like and what I want to hear about, I have to say that Henner was absolutely the right choice and thanks to Eileen for her hard work in sorting this out.

Tutorials

We ended the day on a photobook workshop, splitting into groups and reviewing a number of photobooks against a criteria list we were given and for the final book we were given saying a few words about our findings. While this was interesting to get my hands on some books that I hadn’t seen before and to think about them as a whole, so considering the text, the layout, the size, the material of the book etc. as well as the images in how it projects the work as a single product. There were some downsides with this, we managed to break out as small groups so weren’t restrained to being in the room, however I found that we didn’t have enough time to look at the book effectively and to read the introductory text within, also as we were in groups of 5, we didn’t all get enough time to look through the book before we had to form our ideas and then move on. In the end it was Gilly from our group who spoke most on this with some contribution from me. I liked being introduced to some different books and would happily have spent more time looking through them, I can see ways of improving this session if we were to do it again and I think that the biggest issue was time and number of students per book.

Day 2 (Sunday)

Peter Haveland “Semiotics, symbolism, and metaphor”

Our Sunday began earlier than the Saturday had and at just after 8 I managed to make it down for breakfast, we all seemed a little quieter than we had on the Saturday and I felt this continued into the first session but I think we all needed a bit more time to come round and some more coffee. After all 9am on a Sunday morning for a lecture on semiotics didn’t sound like the best of plans. I was worried about whether I’d stay awake, not because I wasn’t interested but I’d done the student thing of going out the night before, making the most of a night in Leeds, I went celebrating my best friend’s birthday at a rock club, which unfortunately was much better than expected so I stayed later than planned. Despite only having around 4.5 hours sleep, I survived and the session from Peter was quite interesting.

It wasn’t what I expected and at some points did seem to be stilted and rambling but I enjoy listening to tutors and I could see where the subject of semiotics could be useful. We got some recommendations of some books to look at and I’ve since sourced a couple of my own from the library to give me some more background. I think I would have liked there to be more emphasis on reading our own images and how to convey this when we write about them though, but hopefully I’ll be able to do more once I’ve got some background reading out of the way.

As an update on this since my original draft, I actually picked up an introduction to media studies book that gave me some pointers too and was very much an overview of some of the topics we touched on in this session.

Jesse Alexander “Genesis and evolution of a major project”

I hadn’t previously met Jesse before this event nor had experience of him as a tutor so I was coming to his work quite open and without any previous knowledge. He spoke to us on his MA project ‘Threshold Zone’ which he had started and evolved and changed through to presentation of this on light boxes and inside caverns. The overall subject area of underground really fascinated me, while Jesse spoke of how he found these spaces uncomfortable and challenging to be in, it sparked thoughts of exploring urban areas and urban decay, themes that were running in my head for the project that I was working on at the time.  We also saw ‘Turnstile’ an artwork comprised of a series of photographs from an abandoned nuclear bunker (again an interest topic for me) that he’d put to Patrick Allen’s narration of the Protect & Survive public information videos from the 1970s. Not really being old enough to remember the cold war fear, I found that the juxtaposition of the abandoned bunker combined with the advice on what to do in the event of a nuclear explosion and what I can see now as useless and naïve advice on keeping safe quite chilling and showed that while photography has an impact on its own, this can be enhanced and added to by the appropriate narration or soundtrack.

I came away from Jesse’s presentation wanting to know more and it’s certainly something I’ll be looking into when I have some more free time.

Guest Speaker- Peter Rudge from Duckrabbit

I went into this session without much of an interest in film; I have to admit that for me I like still photography and have never really had the inclination to extend this. Peter came across as a really interesting guy and I could have listened to him for longer. It was hard hitting at times as he showed us some example videos such as the Médecins Sans Frontières (MSF) one with a pregnant young woman who has to be driven over severely uneven ground to the hospital, so much so when the 4×4 hits a large hole and vehicle bounces we are left wondering on the impact on her and if she and the baby will make it to the end of their journey. It certainly opened my eyes to a different use of photography, the mix of stills with text and a soundtrack overlaid but interspersed with video really helped to hit the point and I could see where this would work. At the moment time and resources don’t allow me to pursue this but I won’t rule it out for the future and it could be an interesting extension of my work.

Portfolio Session with Peter Haveland

This was the one session where I felt I was prepared and then at the start of the session seriously out of my depth. I knew that for assessment my images needed to have a white border and not to be presented in sleeves. However as mine were printed to the edge, I’d put them in portfolio sleeves in order to be able to transport and handle them. Suddenly seeing everyone’s work out of sleeves and with borders certainly made me feel less than prepared, even more so when I realised that I was the only person who had brought a selection of images that weren’t in a cohesive series. As a result I felt that I didn’t get great feedback, in fact by this point most of the obvious comments on presentation had been made a few times to the other students so there wasn’t really much left to say anyway. I was really impressed by the other students work; some of the images were stunning and so imaginative. Just being able to see these in person and close up was so beneficial. We were in the atrium so had a nice amount of light coming down, I’m not sure the other students had the same conditions and it might have been useful to have seen their work too. The comments from Peter were once again more than useful and very insightful on what happens at the assessment events and having only been through one so far, tips on how best to present and improve are always welcome. Since the weekend I’ve printed some different images for portfolio review and feel I know better on how to present my work which I wouldn’t have been aware of previously.

Wrap Up and Journey Home

At the end of the sessions we all squeezed back into the main room to just recap and to thank everyone and then it was all over and time to head home!

Despite getting to the station in plenty of time, the train was delayed so I spent about 40 minutes waiting on the platform, head crammed full of photography ideas and thoughts. Once I was on the train I managed to get some draft notes written up on my thoughts so that I could share them with the rest of the group and to try and make sense of everything that I’d seen and heard.

Final Thoughts

Taking a weekend out to spend with a lot of people I didn’t know and a few I’d only met either online or at study visits was quite daunting and when I walked down to breakfast on the Saturday morning I felt a little bit nervous. Once we’d all started chatting this soon went out of the way and we all got on surprisingly well in both the short space of time and the smallish meeting room. I feel that I didn’t quite get around to speaking to everyone but I think I made some new friends out there.  It was more than worth it, and while it was a long weekend the schedule was certainly manageable but that’s possibly a benefit from the fact we had all committed ourselves in both time and money and were all open to getting the most out of the weekend.

So famous last words on the weekend? I can’t wait for next years!

Assignment 4: Real or Fake

Assignment Brief

The last few exercises should have helped to clarify your opinion on the potential for altering content and viewer’s perception in an image, and helped you to define your own stance. The purpose of this assignment is for you to demonstrate this stance and the means involve completing a task which lies in the middle ground of the real versus fake argument.

The object is to produce a photographic image to illustrate an imaginary book or magazine cover. Covers are sales vehicles for their content, and so often quite widely interpreted by art directors, illustrators and photographers. The moral ground is therefore potentially ambiguous.

Decide on a topic to be illustrated, you could take an existing book and devise a new cover for it that gets the theme or story across to a prospective reader, taking a photograph especially for it. Explore the areas of adjustment and (possibly) manipulation that would make the image successful as a cover. This might, as just one example involve shading or extending an area at the top in order to make space for the title. Or you might choose to combine two visual elements (juxtaposition)

Accompany the finished image with a description of the techniques you considered using and finally used, and also your ethical justification.

Overview

The debate on real or fake has shadowed photography for decades, well before the advent of computers and image editing software. From modification through pushing and pulling film to enhancing contrast levels in Photoshop, photographers have always undertaken a level of processing to provide them with the most out of the image. While these modifications and removal of dust spots, stray telephone lines etc. can make an image more aesthetically pleasing, the original intent is still there, albeit adjusted but if a person visited the location, they would see enough to recognise it. Where the debate becomes cloudier is in the addition or removal of components that give the image a different context and feel.

Originally the view was that the camera never lies, however with the advent of combination printing where photographers such as Rejlander combined a number of negatives to form one image in ‘Two Ways of Life’, this was proved to be wrong. (Jeffrey, 1996)

It’s hard to write about real or fake without referring to some well-known cases, and one of those has to be the Cottingley fairies. I recently visited the National Media Museum in Bradford where there is a collection of some of their cameras and a reproduction of one of their images showing that the use of techniques to add to a composition have long been in place and that our current software suites are just another tool to create with. Looking at the image with modern eyes and knowledge it’s easy to believe that these are not necessarily faked images but composites mixing reality and fantasy. Would I have had the same thoughts viewing those at the time? I don’t know, I think I might have taken them at face value and believed the fairies did exist without the obvious signs of manipulation, and to put it in the context of the back end of the First World War, it was possibly a lot more believable than it would be today.

clip_image002

At the other end of the scale of deliberate manipulation is the 2003 case of Brian Walski. I only stumbled across this when I was searching for some examples of modified images and found the article to be fascinating. While taking pictures in Iraq, Walksi took two images in close succession and used Photoshop to merge these into one. Van Riper writing for the Washington Post states that ‘He had to consciously manipulate his two digital pictures in Photoshop-an action requiring both skill and intent. He had to create the separate, faked image and –again with intent- transmit it to his editors saying nothing about the alteration’.

This was only noticed when a duplication of the background was spotted, if there had been no forensic trace of the blending, would this have been identified as fake or would it have been accepted as per other images from an established photojournalist who up until then had a history of credibility?

For me, the debate is not black and white and it very much depends on what the use of the photograph is and the context in which it’s being used. For this assignment, the end product I’m producing is a book cover; looking at other covers they are more an exercise in design to get the reader interested than to portray reality. In the case of Walksi, my views are much clearer, if the photograph was to depict a factual moment in time then modification should not have been used, I understand that it created a stronger image but is verging towards propaganda in influencing the audience towards a particular viewpoint. If it had been portrayed in an exhibition or gallery as an example of the conditions in Iraq, then I feel that it wouldn’t have been viewed so harshly.

My research has moved from not just faked photographs, but also to the ethical debate on staging photographs or posing subjects and implying that it’s actually happened in that way and at that point in time. This isn’t something that’s clear cut and we’ll all have our own ideas. For this assignment, my brief is to portray a book cover that stands out, attracts the viewer’s eye and gives a hint as to the story contained within.
With my other photography I will happily modify my images for aesthetic purposes by undertaking digital development, sharpening, removing stray dust spots and minor blemishes. I will consider the audience for the work when I decide what Photoshop actions I need to undertake, and while I can’t say that I won’t ‘fake’ aspects, I can see that these are more for images that will be displayed as art not realism.

The Subject

After giving some consideration to what I could use as a subject, I first of all considered a magazine cover, and then I considered a take on one of my favourite books that’s fantasy based and would be a good subject. The book I chose to re-design was ‘The Affinity Bridge’ by George Mann, essentially its a genre known as steampunk where history as we know it took a different path and we have the Victorian era with airships, automatons, steam powered vehicles and Queen Victoria being kept alive artificially. I’d taken a number of photographs of the peak district landscape as I knew they would be a useful backdrop for the exercises in assignment 4 and I specifically took a number of photographs of this crumbled road knowing that it was a good canvas to add to.

There are two covers to the novel, and I only found the second one after this had been completed so to see that I’ve also echoed the cog design was quite interesting. However I used the cogs as they symbolise elements in the story as well as being one of the most recognisable icons of steampunk related paraphernalia from jewellery through to clothing.

The Process

I checked the background for anything modern and I removed the car, telegraph pole and white lines on the road using the clone stamp tool. I then selected just the sky and used adjustments so that I decreased the brightness and increased the contrast to bring more colour back into the white sky as it was quite white. I worked with layers a lot here, converting the image to monochrome. I then edited an image of an airship, using the magnetic lasso tool to highlight it, and then I boosted the colour to a more brass/gold tone. I then copied this as a layer and pasted it twice into the image to get a feeling that there were fleets of airships.

In order to enhance the steampunk theme of the book, I took a photograph of a leather cog shaped necklace I’ve got, cropped this, saved it as a layer and then pasted it twice in. Using the history brush to remove the white background I’d taken the image on, I took my time and worked carefully to erase the white so that the cogs were standing out.

To finish the image, I chose the viner hand itc font as I wanted something that wasn’t quite modern and put the title and author at the top of the page where I had the expanse of sky and while I always envisaged the text there, it really stands out and works well.

In all I’ve spent around 8 hours working through Photoshop to get this how I wanted it. Effectively editing an image is not a quick process, it needs to be considered and done with care so that any major editing to create a ‘fake’ image will be done with thought and the knowledge that you want to create this effect. It’s not a quick mistake, it’s a planned action.

Thoughts

I could potentially put more detail into the book cover to make it more fantasy related in line with the real covers, but I wanted an edge and sense of realism and I think through the use of the photograph as opposed to drawn or illustrated background this adds interest to the story and what will happen to the UK with the different plot points. While the novel is London based, there are elements such as the use of airships (dirigibles) and the revenants that spread out of the capital.

The Original Covers

clip_image004

clip_image006


The Affinity Bridge- My cover

clip_image008


Bibliography & References

Jeffery, Ian. 1996. Photography: A concise history. Thames and Hudson. London. 2nd edition. Rejlander image p 43

Van Riper, Frank. Manipulating Truth, Losing Credibility. Available through The Washington Post. http://www.washingtonpost.com/wp-srv/photo/essays/vanRiper/030409.htm [Accessed 16th August 2012]

Exercise: Alteration

I had a couple of different images that I could use for this. At a recent classic car show, it was so busy that some of the images had people in the background so I thought these would be a good test of the alteration exercise.

While I’ve managed to remove the two people, I feel the sky it too patchy and not realistic enough, however at this point my skills aren’t enough to effectively rectify this. An advantage of this image was that the background wasn’t too complicated and was quite neutrally toned; I used a smaller brush size for around the trickier areas and ensured that I took my time to get this right.

Original image

Alteration Original

Altered image

Alteration1

Exercise: Addition

Take a conventional landscape view and expose for the sky, take another image exposed for the landscape. Process the two images normally, copy the lighter image onto the darker image and erase the over exposed sky to show the darker sky underneath.

Using CS6, I opened both files side by side, and as I hadn’t actually copied a sky from one image to another, this was all new to me. Luckily I’d bought a magazine that showed me the steps I needed to do as I’m very much still learning Photoshop as I usually just use it for basic enhancement.

Exposed for sky

Dark background

Exposed for foreground

Lighter background

Combined image

Addition1

Now using Photoshop (in my case as this is my chosen software), take this image or any other photograph with a sky. Then choose a different sky from an existing or new photograph.

I selected the sky from the previous exercise and copied the canal image onto it. Using different tools such as the expand and then feather, it helped to reduce/avoid any harsh edges. As the sky was quite dark already I didn’t want to do any further processing to this so I flattened the layers and then saved the image. For a first attempt I’m quite pleased by it as the original image was ruined by such a white sky and where you can’t easily revisit a location, it’s nice that it can be rectified. My only personal caveat would be that any work continued to look realistic and that I didn’t produce anything that couldn’t be seen on another different weather day.

Original image

Addition2

Image with new sky

New sky

Exercise: Enhancement

I made a layer of the image and increased the contrast and slightly increased the brightness. I then used the selection tool to select the iris and pupil to increase the saturation, brightness and I also altered the hue slightly. I can see the difference in the tones on the face and the warmer hue but I can’t see any obvious difference in the eyes. One thing I did notice was that there was a fine line between making an acceptable adjustment, and going too far that it starts to affect the colour and becomes unreal, an example of this is where I’d strayed onto the eyelid skin slightly, if I was more proficient in using Photoshop tools I’d probably be able to select an area more effectively but as there was a little bit of skin showing if I adjusted it a bit too much it turned pink so I knew that I’d gone too far in the image processing.

Original           

enhancement original

Enhanced

eye

Exercise: Improvement or interpretation?

Photograph a portrait in a setting and then use a manual selection method to select just the area of the person e.g. lasso tool or mask painting with a brush. Then save the selection and make any adjustments to this area that makes it stand out more clearly from the surroundings while still looking realistic.

I chose an image I’d taken of a band player at Southport air show where the background is quite busy and the attention should be on him. In Photoshop CS6 I used the magnetic lasso as I was struggling using my tablet and pen and the mouse to get a perfect line, ensuring that I selected the edges of the image as I wanted to darken the background not the subject. I then decided to crop the image just to make the focus stronger on the subject. I feel that comparing the images side by side that there is much more impact with the edited image and the colours make the subject stand out more against the darker background. I’d also been experimenting with the magnetic lasso technique and managed to select the figure and to alter him to monochrome while keeping the background normal coloured. While this isn’t ‘realistic’ in terms of the exercise, it’s a good example of what alteration can be done to make a statement without altering the subjects within the image.

Original image

ii

Modified Image

Improvement

Modified experiment

ii one

Consider the limits

I wouldn’t use this technique to take a subject from a background and to place it in another different context as that can be misleading to the viewer, altering the background/subject to make the difference more tangible is one thing but to create a situation that’s essentially fake to me is one step beyond where I want to go as a photographer. The only situation that I can see this to be acceptable is if you are creating a fantasy scenario, recently I saw some bridal photographs where the subject was placed against a fantasy background and that was obvious to the eye that it was not a natural situation and there was no attempt to mislead. Considering press and documentary photography, the ethics of undertaking changes would negatively affect photography planting a seed of doubt in viewer’s minds and I feel that photographers need to be careful that what they produce depicts reality or is made clear to be a fantastical situation.

Assignment 3: Monochrome

Assignment Brief

For this assignment, choose a theme or a subject that you will conceive, shoot and process in black and white, attempting to bring out the monochrome image qualities of form, tonal contrast and texture, perhaps also experimenting with key. To accompany the final images, which should be between 5 and 10, write an account of why you chose this particular theme or subject, what you set out to achieve from the point of view of black and white imagery, and to what extent you feel you have succeeded.

Background

While it’s an overused quote, this sums up for me the challenge of this assignment, of being able to look at a subject and to see it in black and white.

‘To see in colour is a delight for the eye, but to see in black and white is a delight for the soul’ Hery, Andri (Worobiec and Spence 2008)

In a more digital age, colour has become the standard, where we have digital sensors and screens these predominantly all record and display in colour, leaving the photographer to develop the skill to envisage colour scenes in monochrome and then to recreate this within image editing software. Although Leica have developed the Leica M Monochrom that has a sensor that is black and white only.

I started off my photography using black and white film and even though I now use digital, for me there is a more aesthetical and timeless quality in good black and white images but that the subject needs to be strong to carry it off. As a result I had in mind strong shapes, lines, contours and shading that I knew would stand up to be converted to monochrome. Sometimes colour images can be too bright and busy with lots to take in, in comparison black and white images are more subtle and they force the viewer to slow down to take in the individual tones as opposed to viewing colour and immediately seeing which is the stand out point.

I’d been reading through ‘The making of great photographs-approaches and techniques of the masters’ (McCabe, 2005) making a note of any photographers or photographs that stood out to me to look into further and those that inspired me. One of the images that really stood out was the ‘Sea of Steps-Wells Cathedral’ by Frederick Evans. Architecture is one of my favourite photography subjects and I did consider basing the assignment on this but I wanted to try something new. After reading around on Evans, I found an interesting piece of information stating that his interest was in the texture of stone and the light and shade of buildings, one of my key aims and something that stood out to me when looking for subjects was the texture of the stone and while I was using natural light for all of the images, I found it was often the early morning light that made the subject catch my eye such as the ‘Dry Stone Wall’ where the colours and tones were really standing out in the sunlight.

The assignment called for between 5-10 images, in order to choose my selection, I printed all the images that I’d shortlisted and then spent some time with them pinned up to get an idea of what worked and what didn’t. I was also looking to ensure that they continued to fit my theme of ‘stone’ which encompassed stone, brick, rock, limestone etc. My overall aim was to ensure that some of the characteristics of rock, such as sharp, smooth, hardwearing, versatile were featured. I found that when I was thinking about the scope of this project, I’d visualised stones and rock that were found more in landscapes. As I started on the work, my eyes were drawn to more different forms of stone than I expected, often in areas where I would not have thought to look, and it’s some of these scenarios that gave me the strongest images. I was keeping in mind this assignment as a series that needs to be viewed in a particular order, so I came at this from the angle of presenting these either in an exhibition or in a book. Choosing the order of images was quite tricky, unlike other work where there might be a series of actions or people, each image stood both on its own and as part of my series but aside from all being stone there wasn’t that obvious link from one to the other that would be evident elsewhere. In the end I decided to look at what would provide a clear opener and then followed through how I felt they worked best. To begin ‘Stepping Stones’ seemed to be the obvious choice leading the viewer down a pathway into the rest of the series. I tried to balance the more detailed close up images with the larger subject images as I didn’t want it to go from the stepping stones, obelisk, and tor point to the detailed close ups of stone, pebbles and stone wall as it would feel too disjointed so to intersperse these seemed to make more sense and to remind the viewer that the close up images could form any part of these larger structures.

The Images

1) Stepping Stones

clip_image002[1]

A different use of stone but in the same location as tor point is this path leading down the hillside. It caught my eye as I was sat down taking a break, and I used the low angle as I felt that from a standing position it wouldn’t have the same effect and I’d first seen the potential when I was at a lower angle. I wanted to use leading lines to draw the eye in and along to where the path vanished and all you can see are the hills in the background. I also liked the contrast between the squares of stone and the grass they are set in, the colour difference has come across well in the conversion to monochrome of darker grass showing off the lighter stonework. A couple of challenges I had for this and the trig point image was waiting for walkers to pass as it was a very popular route and in this case I didn’t want to have a person in the image as it would have given it a different feel. I tried three different compositions to this but I preferred this one where you could see the whole of the stone on the right hand side and to me, I feel like that I’m on top of the path.

2) The Hand

clip_image004[1]

An abstract sculpture of a hand holding an arrow caught my eye for the sheer size of it, but the background was cluttered with benches, flowerbeds and a glass visitor centre in the background. I didn’t know if this was going to work so I decided to zoom close in from a lower angle and fill the frame, I wanted to get the stone in but not the main part of the arrow as it was confusing as to what it was. In colour this didn’t work, it didn’t have any impact, but I think with the conversion to monochrome it stands out much more and the texture and shadows within the stone stands out. As well as showing the strength of stone, the subject of a clasped hand also to me portrays physical strength in the clenching of a fist.

3) Dry stone wall

clip_image006[1]

This caught my eye as the wall in colour had a lot of interesting colours and tones, combined with varied shapes, lines and textures that I felt would have enough power to draw the eye in and to keep the viewer engaged in looking at the image. I got close in to the wall as I wanted the pattern to just fill the frame to force the eye to look at the patchwork effect. It also had the advantage of taking it out of the context of Chester Zoo and encouraging the viewer to think about it, where it’s located and what’s behind it for example.

4) Marker Stone

clip_image008[1]

The Monsal trail, is an old railway line that’s now been converted to be a pathway for walkers and cyclists, as a result there are lots of details still left from its life before. One of those was a brick obelisk that looked like a marker stone cut into the natural rock landscape of the hillside. This immediately grabbed my attention as it just looked striking against the rock and abstract shape and strong lines seemed well suited to be converted to monochrome. I positioned the marker as central as I could in the image as I wanted symmetry. The lines of the marker lead the eye upwards into the image, but then the contrasting horizontal lines also ensure the viewer looks at the left and right side taking in the whole image. The conversion has still kept the tones in the rock, and the viewer can see the lines between the bricks which I wasn’t sure would still be there once converted but I’m quite happy with it.

5) Rock Texture

clip_image010[1]

Walking through Dovedale I saw lot of different rock formations and shapes that while they looked stunning, I didn’t feel that they were strong enough for the subject as they were very much more landscape images with less emphasis on the characteristic of rock. I did pass some loose rocks that had fallen from the landscape at some point and were lying on the side reclaimed by nature and the texture and ripples within these really caught my eye. I knew I wanted to photograph these but I didn’t know how effective it would be or if it would work when taken out of the context of its environment. I tried a landscape and a portrait layout for this, and I preferred the landscape as you can see the layering effect of the rock. While the tones and textures of the grey and green stood out in person, I didn’t know if they would when converted, and even when I’d been viewing the test print as part of the selection, I wasn’t sure if it was suitable for my audience. I tried to picture this hanging in a gallery and within a series between ‘Marker Stone’ and ‘Tor Point’ it fits in. However I’m not sure if it was out of context on its own as to how strong it would be as a single image. I feel that as within a series it helps to tell a story to the viewers.

6) Tor Point

clip_image012[1]

This trig point attracts a lot of attention, when you reach the peak of a hill you automatically go over to the trig point and a lot of people were posing for photographs with it as a record of an achievement. Once you get onto the hill, this was the highest point around and seems to grab your attention. As a result I decided this would make a good subject if I got the composition correct. I didn’t want it to be a normal landscape with this just in the centre of the image, I wanted it to be large and dominating so I knelt in front of it to capture some of the stones it was sitting on and the landscape and sky behind it, I was quite close to the stone as I wanted the frame to be filled and out of all the images I took of this, I liked the one where it was just going off the print as it needs some space around it to put it into context. In relation to the stone, I like this as though it forms a shape, it’s not man made, the sides are not perfectly flat due to the stone being used and the different shapes and texture of each stone forming this point are evident.

7) Pebbles

clip_image014[1]

I had an image in my head that I’d seen somewhere of pebbles that had been arranged and photographed from above. In reality I didn’t have to set this shot up, it was part of the environment within a butterfly house that I found by looking down from a bridge in search of butterflies. As soon as I saw this, I knew I wanted to photograph it, the smooth texture and size of the rock on the top left of the image caught my eye, while I’m sure the arrangement had been composed, it looked natural to me, I was happy to have the twigs in there as it added a more organic feel compared to a set up still life. The colours were quite muted and neutral so I could see from the first image that I took, that it would work well as a conversion as there was nothing in that scene that would be lost by it not being in colour. I can also see this tweaked to have just a hint of colour and used as artwork. For a strong composition, once again I filled the frame with the stones as I wanted an effect where the stones were leading the eye out of the image and suggesting the pattern was continuing. Compared to the rest of the series, the smoothness of the rock creates a distinct contrast and creates a sensation of wanting to reach out and touch them, and shows that stone can be smooth and tactile.

8) Stone Griffin (Tideswell)

clip_image016[1]

I’d passed this statue a number of times in the car and it always grabbed my attention, so when I was walking through the village a few days later, I made a point of photographing this. While I tried a number of different angles, this was the most successful as it had the comparison of the statue against the background stone of the bank. Other angles had too much of a cluttered backdrop of the street, road and houses and I wanted the focus to be very much on the griffin with a shield as if it was defending a castle. I think that it worked quite well, the overall colour was quite neutral and muted so I didn’t need to do much post adjustment on the tones. From a composition angle, I like the fact the subject is strong, there are clear lines and shapes and you immediately can recognise what you’re looking at.

Processing

All of the processing was undertaken in Adobe Photoshop CS6. I used the black and white conversion option which gave me a number of different filters. For most I opted for the default with some minor tweaking increasing the saturation, the blacks and reducing the yellows slightly. For some images that had a good range of tones already, I felt that I didn’t need to do anything further than a straight conversion. I printed test prints off from the printer that I was going to send the final images to so that I could check the colours were ok and not too dark. While I didn’t need to do any further tweaking, this would have been the stage for this, and then I would have repeated the test print process.

Summary

This was an interesting assignment to tackle, challenging due to the option of choosing any subject. My concern was that I would choose poorly and not have a strong enough subject to carry a series of images. I think that I chose my subject well and that it had the scope to show some of the image qualities of form, tonal contrast and texture required in the assignment brief. I’ve certainly got more of an eye for black and white and have learned to recognise in an image components which work well and those which won’t necessarily translate from colour.

If I had to replicate this assignment, I’m confident that I’d still choose the same images and go through the same shortlisting process to get to the eight that I’ve presented here, I would like to do this again with another subject and see how the results compare. If I had to make any changes, I’d probably be inclined to create a still life of stones and pebbles and to light this artificially just as a comparison to the natural environment and to continue my skill set obtained through the Art of Photography course.

Bibliography

Cheung, William. 2003. Black and white camera craft. Ava Publishing, p6

Evans, Frederick- Sea of Steps- Wells Cathedral . Available through: National Media Museum, The Royal Photographic Society, National Photography Archive. http://www.nationalmediamuseum.org.uk/Collection/Photography/RoyalPhotographicSociety/CollectionItem.aspx?id=2003-5001/2/23326 [Accessed 4th August 2012]

McCabe, Eamonn. 2005. The Making of Great Photographs: Approaches and Techniques of the Masters of Photography. David & Charles Publishers, pp 52-53

Worobiec, Tony and Spence, Ray. 2008. Black and white photography in the digital age. 2nd edition.
David & Charles Publishers.

Notes

I can’t find the original source for the Andri Hery quote outside of the book by Worobiec and Spence where I first read it. I have found that Hery has officially changed his surname to Cauldwell so this quote could be found under this name too, but again actual evidence on the internet is hard to find but I wanted this clarified here for any future readers.

Information on the Leica M Monochrom
http://uk.leica-camera.com/photography/m_system/m_monochrom/ [Accessed 4th August 2012]

Printing

This assignment required me to submit some prints as opposed to my usual digital submission. While this wasn’t a problem, I’ve learned some things during this process. I originally chose 10 x8 prints but looking at these, they didn’t fit the images and when I resized images, I found I still lost some detail as well as some aspects appeared stretched or compressed. I then decided to try a slightly smaller print size of 10×7 which was more the correct aspect and once the images came back from the printer, I was very happy with them.

I opted for a matt finish as I find gloss is too shiny, catches light and reflections easily and shows up fingerprints. One thing that I didn’t do here and will consider in future is to add a white border around the image so that they can be handled without the body of the print being affected.

Online learning log

All entries into my paper learning log are replicated electronically here

Study Visit- Sheffield. OCA v Sheffield Hallam

This was my first study visit to the Bank Street Arts centre in Sheffield and I was really looking forwards to seeing the collaboration between the OCA and the art centre in the form of the new exhibit by level 3 OCA student Tanya Ahmed with ‘I call this place home’

As a level one student with a long journey ahead of me with the my photography work, getting the chance to see work by other OCA students can be so beneficial to know where my peers are and to provide some assurance not of my creativity but that I’m on the right lines with the coursework I’m producing. Getting the chance to see level 3 work in person and to see where I need to evolve to was worth the travel over as we rarely get a chance to see this.

The gallery itself was very bright, light and airy with some natural light, however the spotlights did create some glare onto the glass of the images but that seems to be a common occurrence in galleries and as a viewer you just need to adjust your viewing point. However as a photographer, I need to give consideration to positioning in exhibitions, the lighting, the type of framing method I use etc. in an attempt to mitigate this issue and to present the work in the best form that I can.

We met as a group downstairs and had some discussion on the gallery and the collection. The images we were seeing were only a small amount from a much bigger piece of work and to be honest a couple of the images didn’t quite flow with the rest and I wonder if the ones that weren’t chosen would have been better placed here. With all of the views into the subjects homes, the men on the street and the guard on the street corner seemed to be at odds with these and feel like they belonged to a different collection. However the risk of having such a small selection of images from a larger body of work is choosing the right ones to effectively show the breadth of work and also to allow the images in a smaller selection to sit together and still work.

The images were taken around the East 100th street district where photographer Bruce Davidson had originally produced a body of work in the 1970’s and his book was placed in the gallery as a reference point. The discussion later on touched on the comparison and the differences between the two captured within the same geographical area, and how the viewpoints of the two artists differ over the span of time between the two. An overall thought was that Tanya was trying to get positive side over, the changes in the neighbourhood since Davidson’s work and the pride these people have. Her images show that there is a good relationship between Tanya and her subjects, these people being photographed have welcomed her into their homes and look relaxed with her presence. I questioned whether she had posed them specifically or if they’d just chosen themselves, however one of the other members of the group had attended the private view and was able to fill us in on the fact that Tanya had asked them to be where they were comfortable, she didn’t pose them. However she had requested that they didn’t undertake any tidying up, wanting the natural view but it seems mostly ignored by the subjects, but I’m sure that’s just basic human nature when expecting a visitor or a viewer to their house.

While most of the images of the inside of the apartments flow well, and if I hadn’t been told this was an area in New York, I wouldn’t have guessed, there was one image where we feel like a voyeur watching the subjects through an open door in their kitchen, looking very natural and not posed. While she’d been welcomed in to participate, this feels as if she in an outsider, and I wonder at which point in the process that this image was taken and it bring to mind a quote I’d read by Bruce Davidson where he said in reference to his work ‘Outside Inside’, “I start off as an outsider, usually photographing other outsiders, then, at some point, I step over a line and become an insider. I don’t do detached observation."

Without any text accompanying the images, aside from an introduction, as a viewer it’s more difficult to understand and interpret what we’re seeing.

sv1

Another debate that we had was on the actual physicality of the work, while there was no argument that the images showed good exposure and technical control, they were let down by the framing. While the print sizes varied, no attempt was made to ensure that all the frames were the same size and this meant that there was no fluidity between the frames as the eye had to move up and down to match the hanging. While an attempt had been made to level the tops, the differing sizes were obviously still there and we discussed some points for choosing and hanging prints which I’ll certainly list in my journal to refer back to.


Sheffield Hallam Degree Show

degree show

After the study visit we then walked over to Sheffield Hallam university to see ‘Creative Spark’ the BA Photography degree show. Seeing a degree show was a new experience for me so I was very interested to see what the quality of work of full time students undertaking a traditional degree would be like compared to the work I’ve seen by OCA students. First of I wasn’t expecting the high number of students to be exhibited, and secondly I wasn’t expecting the quality to be so mixed. Some specifics I was looking for more than the actual subjects of the work, was how it was presented and getting ideas for how I can present my work better when it comes to assessment. As well as the quality of work varying, so too did the presentation methods with hardbound books, soft booklet type books, large prints in archive boxes, postcards, projection and prints set together with physical props.

When looking at the content of the work, I was disappointed by the quality and as well as seeing technical flaws such portraits blown up that lacked sharpness, I was also concerned by some of the subject matter. One student had present a set of prints of animals in zoo’s and having used animals in zoos for previous work I’d submitted to the OCA, I struggled to understand why they’d first of all chosen the images they did, I felt the composition was nothing greater than a quick snap from a distance, and why she’d actually including the wires of the cage when with a good lens this can be eliminated to give a more natural image. I found that the selection entered here were images that I would have deleted on first review. I was also concerned by the British images of the tea set and of Chatsworth house, both subjects I’ve tackled before and with technical issues of missed focus and overall softness, lack of colour tones etc. I understand that it’s getting harder to come up with original ideas and takes on subjects, but if this is the quality after three years of teaching and study, I have to wonder as to the level of skill of some of the students concerned.

It wasn’t all negativity as I saw some work there that was both reminiscent of my own with the ‘Everyday Colours’ artwork by Elizabeth Colquitt. Some of the colour images I’ve taken previously would have fitted into this quite easily.

I did find it very beneficial to see different work and especially to review it with fellow OCA students and would consider seeing more degree shows next year.

Some gallery images:

sv2sv3SV5